

How To Make A Simple DIY Leather Yoga Mat Strap
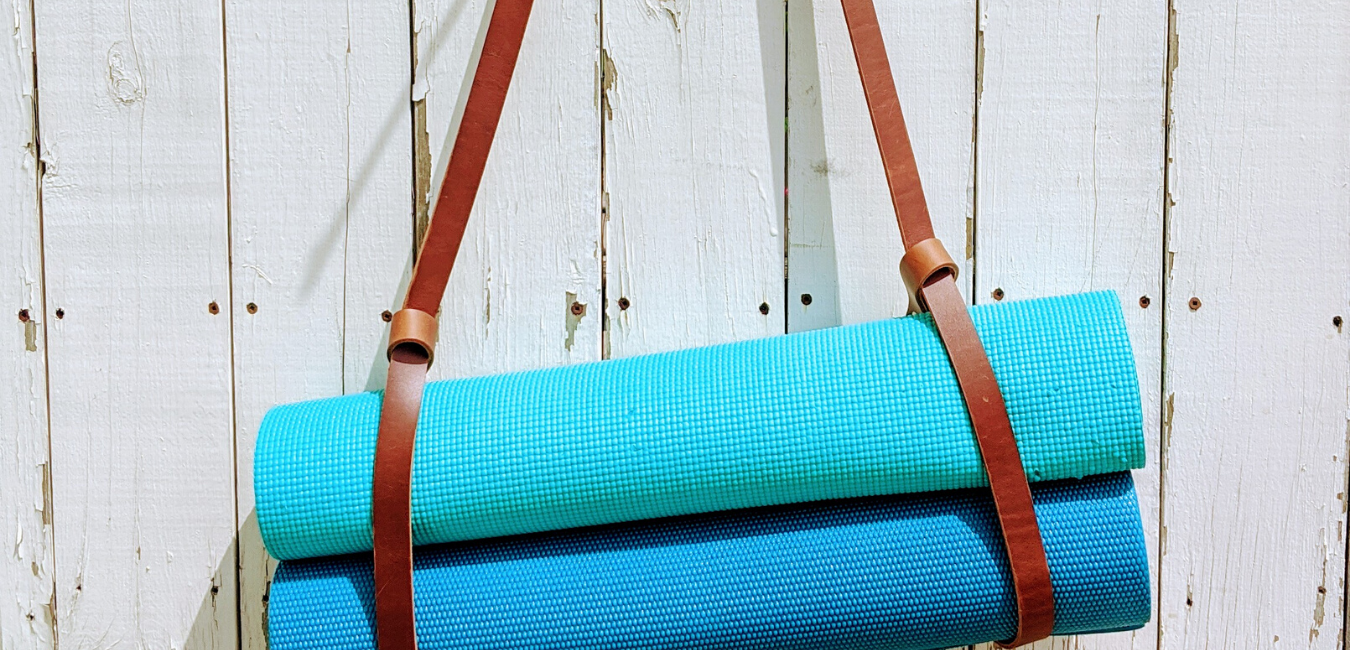
There’s a lot of folks taking up yoga recently. I’m one of them for sure. Maybe you’ve invested in a shiny new yoga mat and you’re looking for a way to carry and store it that’s a bit more appealing than throwing it in a corner. You’ve come to the right place!
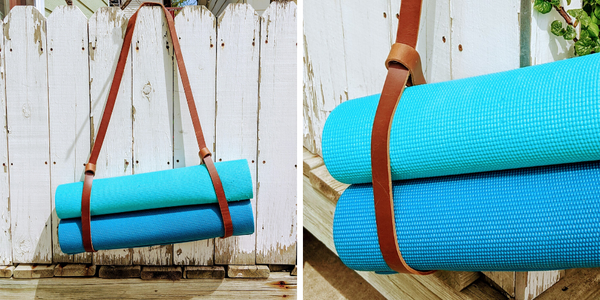
With a few simple and inexpensive supplies, you can create a simple, but lovely, carrying strap that you can use to haul your mat around your home or to the gym.
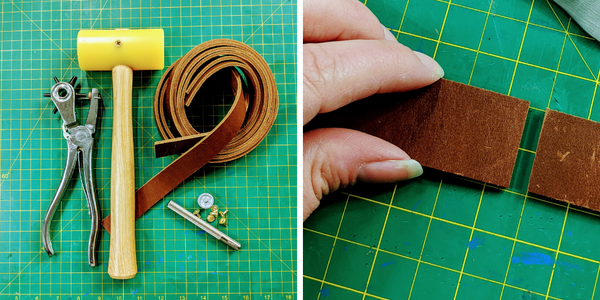
Supplies Needed:
Leather Straps (we used one inch wide, and combined two straps for extra length)
Mallet
Skiver (optional)
Needle and Thread (optional)
To start, gather your supplies and lay out your straps. We used two of our pre-cut straps to make sure that our carrier is extra long.
If you want a shorter strap that will keep the mat or blanket right in your underarm, a single strap will do, and you can skip the steps combing the two straps and go straight to creating loops!
Make sure to trim your edges so they are clean and straight. If you like the look of rough edges, you can keep them!
If you are wondering, these beautiful leather straps are oil tanned straps (but feel free to use any leather you prefer, something within the 4-6 oz range works great). They feel soft to the touch while still being sturdy enough to stand up to regular use. This leather also has what is called a “pull-up”. This means every bend or scratch in the leather will lighten in color and give this a much more rustic and worn appearance.
Since we are using two straps, we need to combine them to create one long strap. Place them on top of one another and mark, with a pen or with an awl, where you would like to add your rivets to hold them together. I’m using two rivets to make sure the straps don’t swivel on themselves.
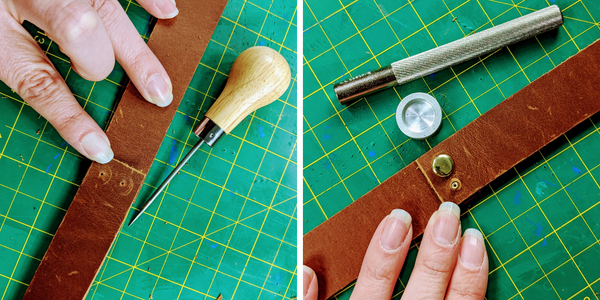
Once you are happy with the rivet placement, use your hole punch to create the holes for your rivets. Use the rivet setter and mallet to set them in place. If you are unsure of how to use the rivets, check out our tutorial!
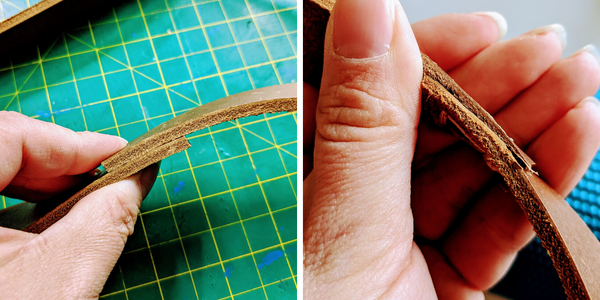
*Optional* You can skive the straps to reduce the bulk to have them lie flatter and appear less chunky. Do this with a skiving tool or a knife. Skiving with a knife can be difficult for beginners and even some novices, so if you are using a knife, be extremely careful.
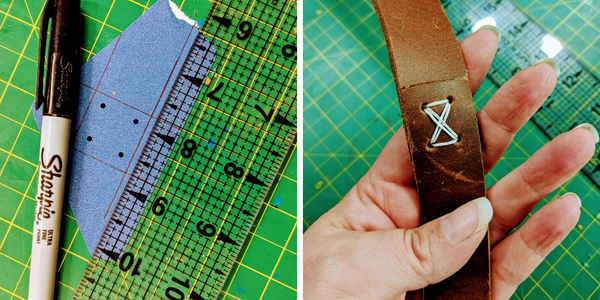
*Optional* If you would prefer, you could use a needle and thread to do a decorative hand stitch instead of rivets. I did a large cross stitch, doubled up for strength. I created a small template, then marked the stitch holes with a pin. I used the smallest punch to create the holes and laced my poly thread through a few times.
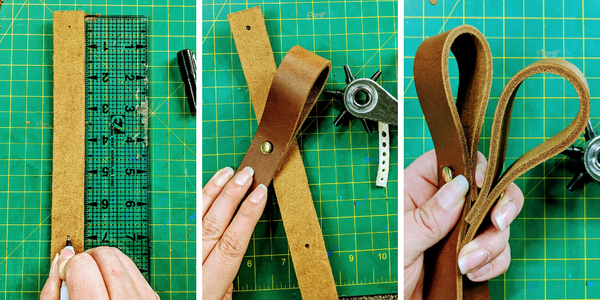
Now that you have one long strap, we need to create the loops for the ends of your carrier. On each end of the strap, measure for two holes. One ½ an inch from the end, and another 8 inches from the end, down the center of the strap. You should have 4 marks total.
Again, take your leather hole punch and punch where you made the marks.
Fold one end of the strap so the two holes line up. Set your rivet using a mallet. Repeat this process on the other end.
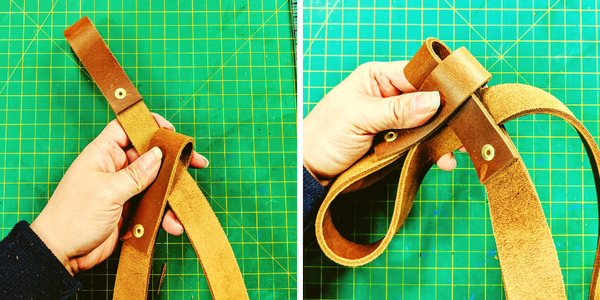
Now you should have one long leather strap with a loop on either end. To create the adjustable ends for your mat, you have to do a little magic with the loops.
Holding an end in each hand, pull the right loop partially through the left loop. Then pull the left loop all the way back through the right loop. It may be easier to pull the left side of the strap through before the left loop itself. This will take a little finagling, but it is easier done than written out.
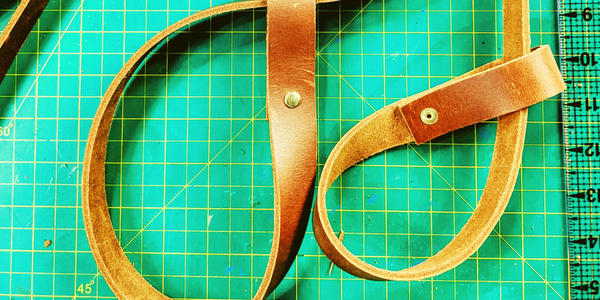
You’ll now have two larger loops on either end. Loosen them to adjust their size and marvel at the new carrier you’ve made with only a few simple items.
This is a great, simple leather craft for beginners. Not only because of the simplicity, but because the tools needed are not super advanced.
If you or your loved ones aren’t into yoga, this also makes a great blanket strap for picnics. You could even wrap tents or sleeping bags up in this strap carrier when going on a weekend long hike.
You could make this project with leather scraps or sides you may have already laying around your shop. This is one of those DIY projects that isn’t super precious and can be done cobbled together with whatever pieces of leather you may have. In fact, it may even add to the look!
If you make this project, we’d love to see it! Tag us on social media with #theleatherguymn and we just may share your picture. Thanks so much for visiting our blog today. Namaste.