How To Make A Drinking Horn Holder (Free Template)
So you bought a cow horn and you're not sure what to do with it? It could sit on your mantle...or you could turn it into a drinking horn!
Now, a horn isn't going to hold itself upright when filled with drink, so you'll need a way to support it. Let's make a holder that can attach to your best belt or baldric.
Here's what supplies you'll need:
Leather 4-8oz (I used a single piece of Bridle scrap, 4-5 oz)
Utility Knife
Ruler
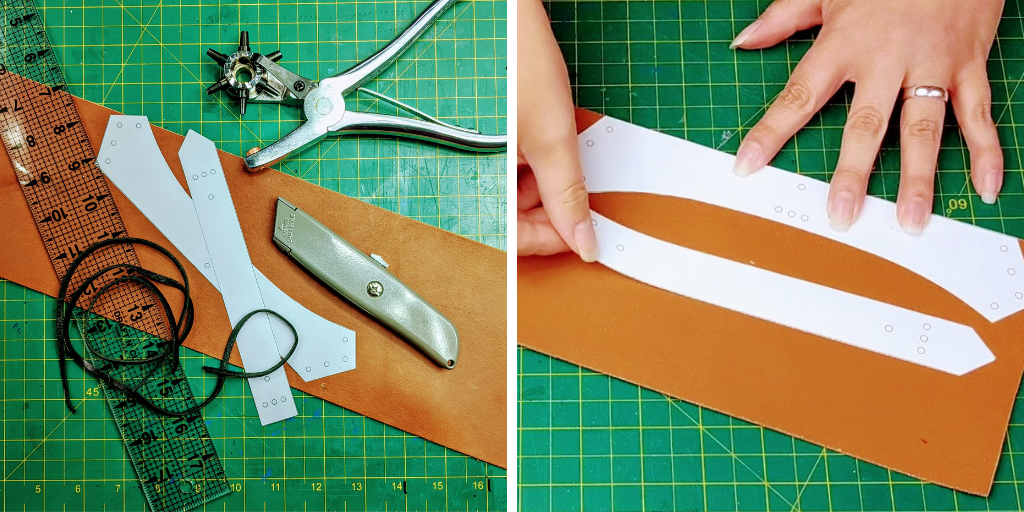
Print out and cut your template. Lay the pieces on your leather. I squared off the edges of my scrap piece so I would have straight edges to work off of.
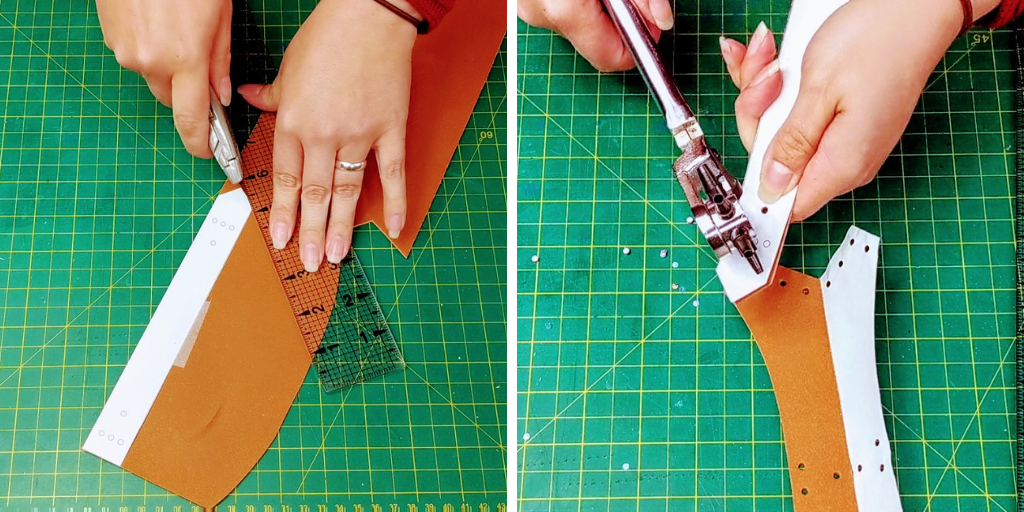
Carefully cut around your template, using a fresh blade on your utility knife. A dull blade can make it really hard to cut through leather.
Once your pieces are cut, it's time to punch the lacing holes. I used a small piece of tape to keep the template in place while I punched it. Use a low tack tape as tape can damage leather.
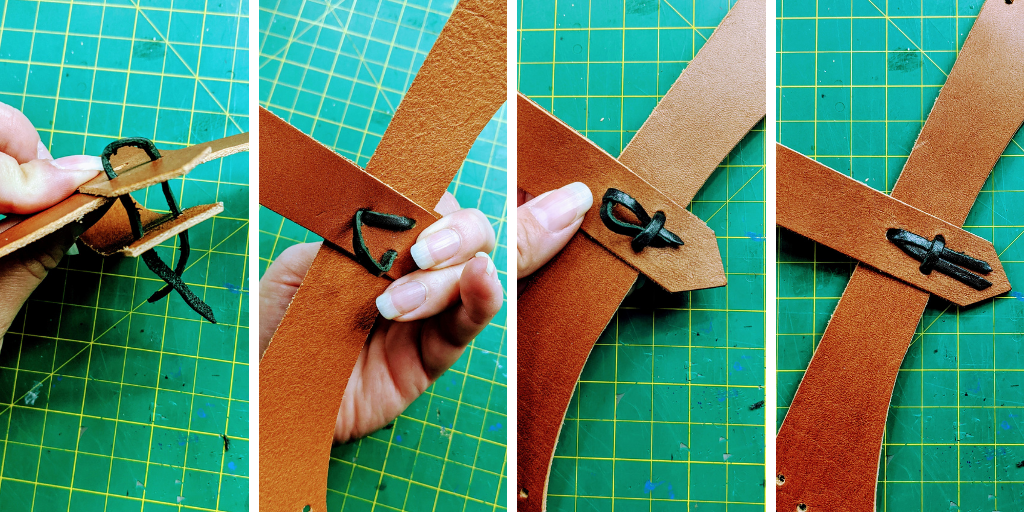
Once the holes are punched, it's time to start attaching your pieces together. I went with using lace to hold the entire thing together. It is super simple and does not require a bunch of tools or hardware. You are going to create a knot that will hold the belt loop to the body of the holder.
Starting from the front, finished side of the leather, take a 5-inch strand of lace and put it through the side by side holes on the angled end of the loop. Then weave those through the same holes on the holder. Finally, bend the belt loop back, and weave the lace through the same two holes. Pull the three layers together.
Now, you're going to weave both ends of the lace through the single hole, above the side by side ones. You may need to make this hole a little larger if using thicker lace.
Once you've pulled both ends through the top hole, snake them through the straight bit of lace below, and tighten the whole thing. Now your belt loop is attached with nothing more than a strand of lace!
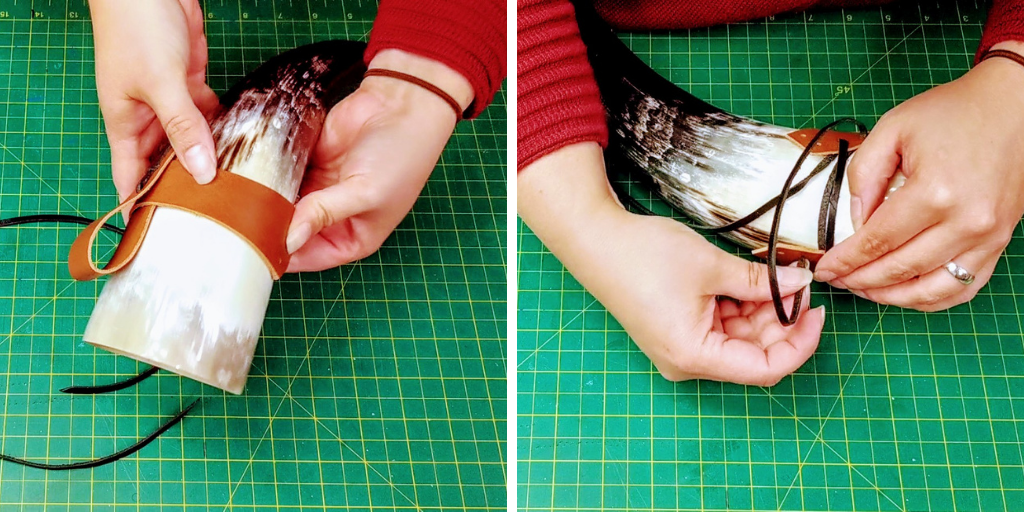
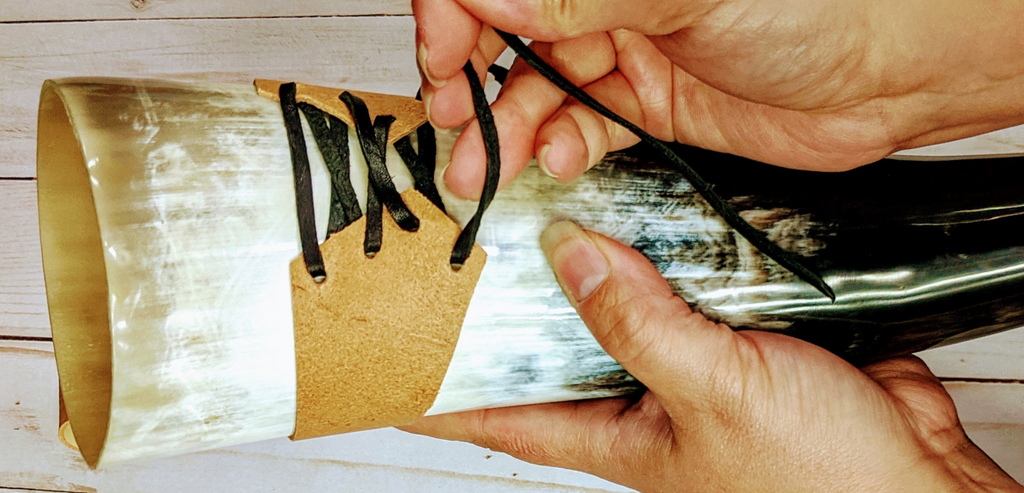
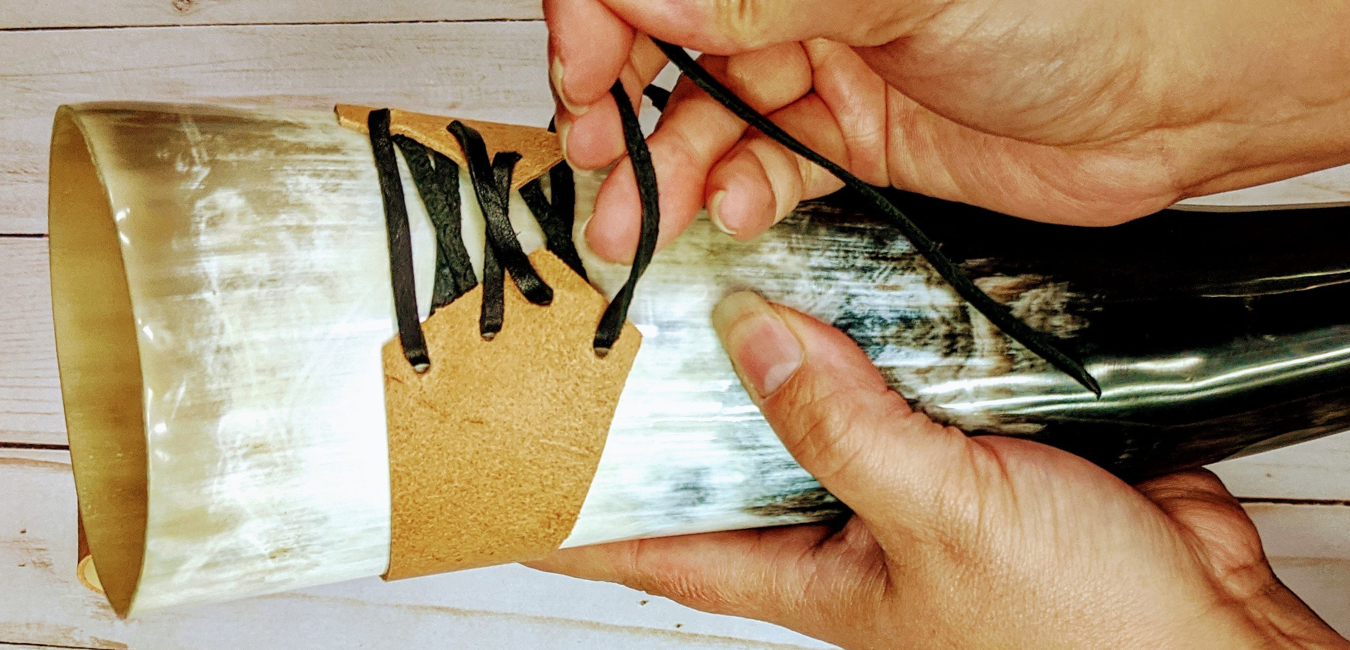
Wrap the holder around your horn, and begin lacing it up. You can do this just like a pair of sneakers or pick a more decorative lacing pattern. Pull the lace tight so that it is snug against the horn.
When you reach the bottom, simply knot your lace, or add a bead or two, to keep the lace from slipping back through the holes.
Your horn should slip easily out of the top of the holder to drink from, and nestle back in tightly when placed back in. This holder will always be adjustable, should you upgrade or downgrade your drinking horn!
And there you have it, a simple horn holder, made in 15 minutes or less.
Add stamping, paint, beads, or metalwork to customize your holder however you see fit. Whether going for a Viking look or frontier-style, this simple template can be modified however it may work best for you!