

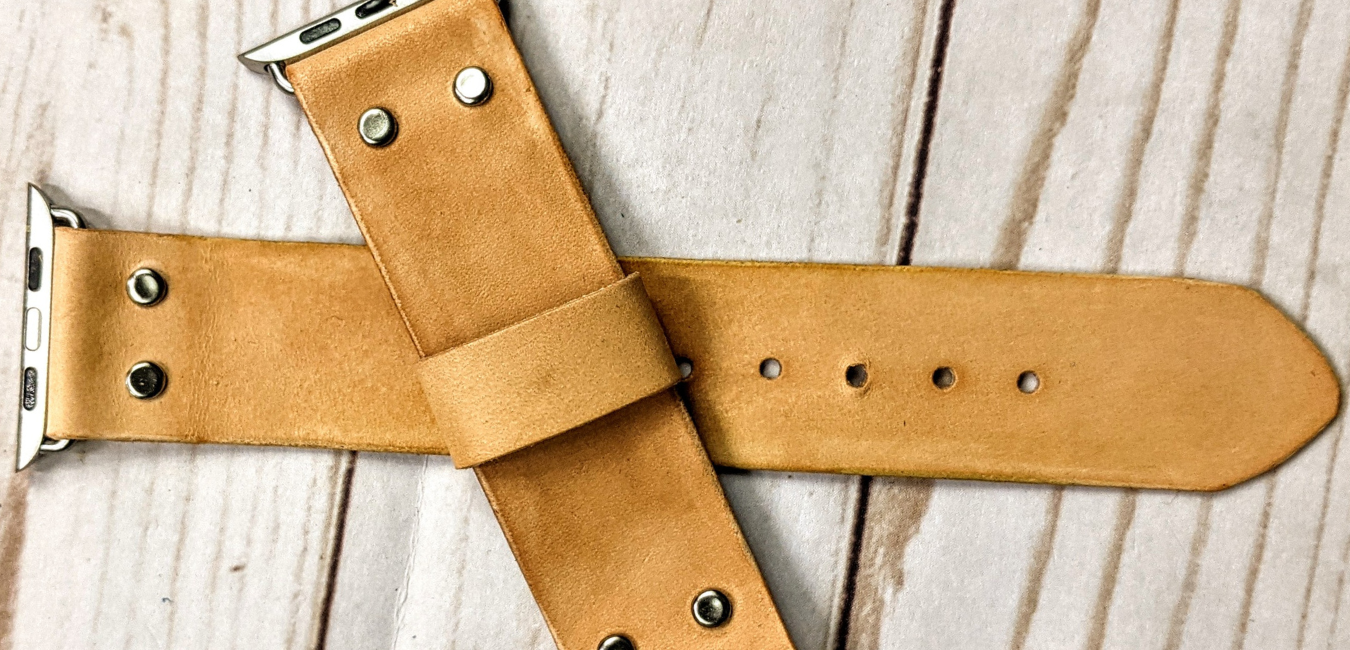
Make Your Own Easy & Inexpensive Leather Watch Strap (No Sew)
Creating a no sew DIY leather watch strap is a great project for learning a more complex process, while still being simple enough to tackle in a single afternoon! So grab an old watch, a few supplies, and let’s get started.

Supplies Needed:
Leather 2-4 Oz Vegetable Tanned
Scratch Awl
Mini Rivets
Hole Punch
Knife
Ruler
Mallet
Watch Hardware
Using an old watch band gives you a built in template to work from. Trace around it to create a template. If you don’t have a watch band to trace from, or you want to make major changes to the shape, you’ll want to use your hardware to set your parameters.

Here, I am creating a strap for my Apple watch adapter. The inside of the adapter is just a hair over an inch wide, so I cut my leather into one inch wide sections. If you are using a regular watch, you’ll want to gauge this measurement off the spring bars that hold the straps to the watch face.
Once you’ve cut your straps, you’ll want to double check that they fit snugly in the hardware. Once you’ve confirmed that the straps fit, you can move on to the next steps.
Let’s start with the long side of the strap.
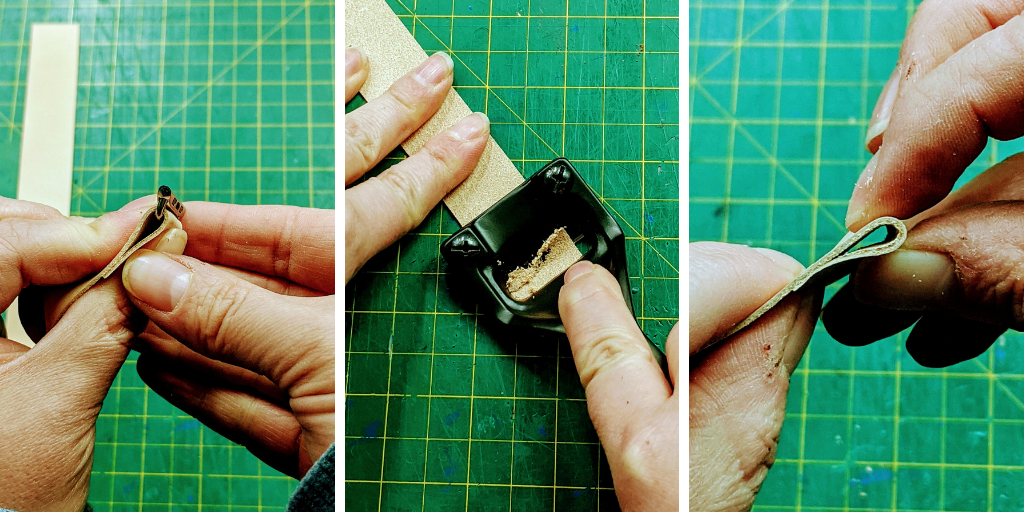
You’ll notice that the leather seems a little bulky where you are folding it over the hardware. If this is the look you are going for, leave it! But to prevent bulk, you will need to skive the folded ends of your straps. This takes a little practice, and I would advise doing so on some scrap leather that you don’t care about.
This process is about patience, and learning how much (and more importantly) and how little pressure to apply when shaving away layers. Press too hard and you’ll go right through. Press too soft and it will take you ages.
However, once you get it right, you will never know how you lived without it!

When you’re happy with how your leather lays, apply a little glue on the very edge of the strap and a little further down where the edge will be attached to the body of the strap.
Let the glue get tacky before folding the leather over. Be sure not to glue the fold all the way down, you need room for the hardware to fit through.

When the glue has dried, mark your rivet holes with your scratch awl. I’ve set mine half an inch apart, using a ruler to make sure they are evenly spaced and straight. Once the placement is set, use your hole punch to make your rivet holes.

Since I am working in the confines of an inch, I use extra tiny rivets so they would secure my strap without looking too heavy.
Just like any other rivet, set the post through the hole and attach the cap. Set them with your mallet and you’re good to go! If you are unsure about how to set a rivet, watch our YouTube video here.

I need the long end of my watch strap to be about 5.5 inches. I am marking that length with my awl and using it as reference to cut a more decorative shape at the end. Slowly cut the shape you wish the strap to be. Pointed, round, squared off, or angled will all work. This is your design!

Next, you need to add the holes you use to adjust your buckle. This is another instance where having the old strap will be very helpful. But if you don’t have one, create a small paper template to help make sure you line the holes up perfectly.
Just like the rivet holes earlier, these are all half an inch apart.
Again, once the placement is to your liking, take your hole punch and make those holes!

Now we are going to move on the buckle strap. This strap will have hardware on both ends. The buckle on one end and the adapter or spring bars on the other. If you are skiving your leather, you will need to do both ends at this time.

Set your buckle on your strap and mark your center and buckle bar sizing. I need to create an oblong buckle hole for the bar to fit through and swing freely. However, most folks do not have an oblong punch specifically for this task. So I am going to use my regular hole punch and knife to make this work.
Punch two holes on either side of the crease where you will be folding the strap over. Take your knife and cut out the leather between them.

You now have an oblong hole that will allow the bar to move and adjust as you are putting the watch on. If the bar is a little stiff, you may need to lengthen the oblong cut just a hair.

With your buckle in place, follow the same steps you did earlier to secure your hardware. Apply glue, mark your rivet holes, punch them out, and secure your rivets. Then, fold over, glue, and secure the other end of your buckle strap.

Now that all your rivets are in place, let’s do a little finishing on the edges. I’m using a beveler to round off the edges a tiny bit, but this is totally optional.
Apply water, Tokonole, or Gum Tragacanth to the edge and use a slicker tool to smooth the edges and give them a nice sheen.

Now we need to create the sliding loop for your buckle strap. This will keep the long strap from flopping around and getting caught on things.
Slice yourself a thin strip of leather. I cut mine half an inch wide. Stack your finished straps on top of each other, and wrap the small strip all the way around. Using your awl, mark where to cut off the excess. This will become your loop.


Once your loop is trimmed down, skive one end (optional), wrap it back around both watch straps, and mark your rivet hole. Punch the hole, apply the glue, set your rivet (this should be old hat at this point) and you’ve got a finished loop!

Gather your adapters or your spring bars, and put them through the folded ends of each strap. If using spring bars, you can attach these straps to the watch face immediately. If using Apple adapters, you’ll run no risk of losing the hardware once secure, so you do not need to attach them to your watch face right away. But you can if you’re raring to see how the new strap looks!

Finally, I applied a little conditioner and oil to give my watch straps a bit more of a patina and to help waterproof them.
There you have it, a simple watch strap that can withstand a lot of wear and tear. As always, this is just the basic steps. From here, you could dye, stamp, or tool your straps. Paint a small scene on them. Add some studs or even more rivets. There are so many options!
Thanks so much for reading along. We will do another blog soon on hand stitching a watch strap for those who are comfortable with needle and thread! Hopefully that will be any of you who complete this project!
Be sure to share your projects with us on social media by using #theleatherguymn. We love to see what you all make!