

How To Make Your Own Leather Belt (VIDEO)
Making a leather belt is easier than it may seem. Grab an old belt to use as a template, a few supplies, and you could have a brand new, handcrafted belt in under an hour. Keep reading to learn how!
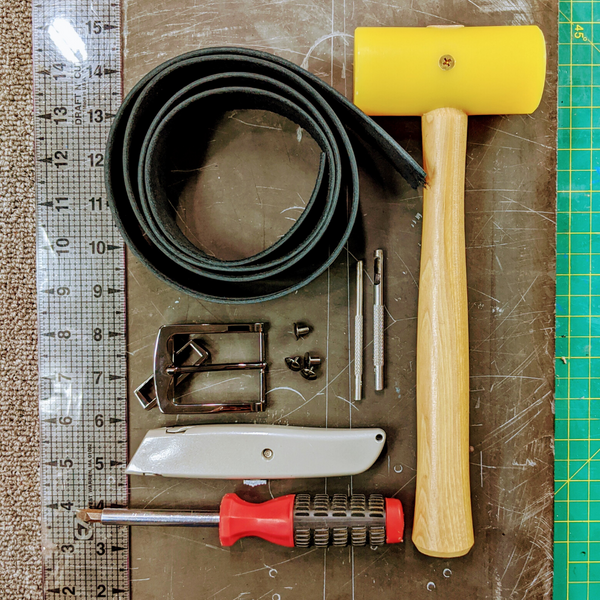
Supplies Needed:
Belt Blank / Leather Strap (we used a 1 ½” strap for this project)
Chicago Screws
Belt Buckle (be sure the buckle will fit your strap, we used a 1 ½” buckle)
Utility Knife
Screwdriver
Optional- Strap Cutter & side of leather, to cut your own belt strap
Optional- Gum Tragacanth

To start, you’ll want to select one end of your strap, and decide how much leather you need to fold over to hold your buckle and belt loop. Typically, 2-3 inches is plenty to work with.
You can use a mallet to tap the fold down into a crisp fold. If you have a leather skiver, you could thin down the backside of the leather for a crisper fold as well.
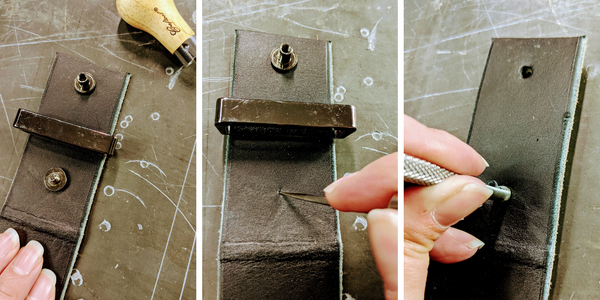
Lay out your buckle fold, and place your hardware and belt loop, so that you can figure out your spacing. Use a pencil (or an awl) to mark your hardware placement. When you're happy with their spacing, go ahead and punch your first two holes with the leather punch.
Fold your belt back over, and using a pencil or marker, mark the corresponding holes on the belt. This will ensure the holes line up perfectly for your screw posts. Go ahead and punch those holes as well.
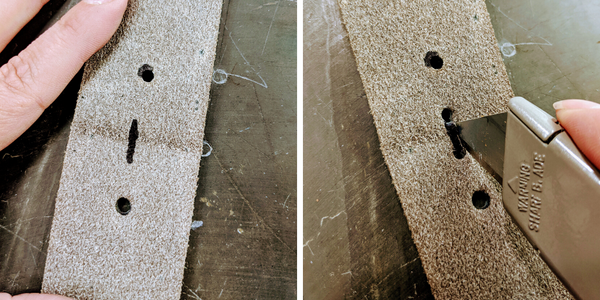
Next, you’ll need to create an oblong hole for your buckle’s post. Mark a half-inch long spot, centered on your fold and belt. Take your hole punch, and create a hole on either end of the mark. Use your utility knife to cut out the center space, and you’ll now have a perfectly sized notch for your buckle post to slip through.
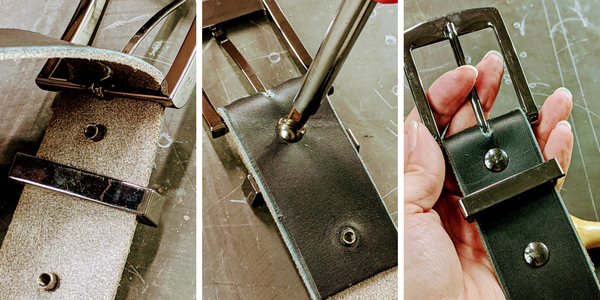
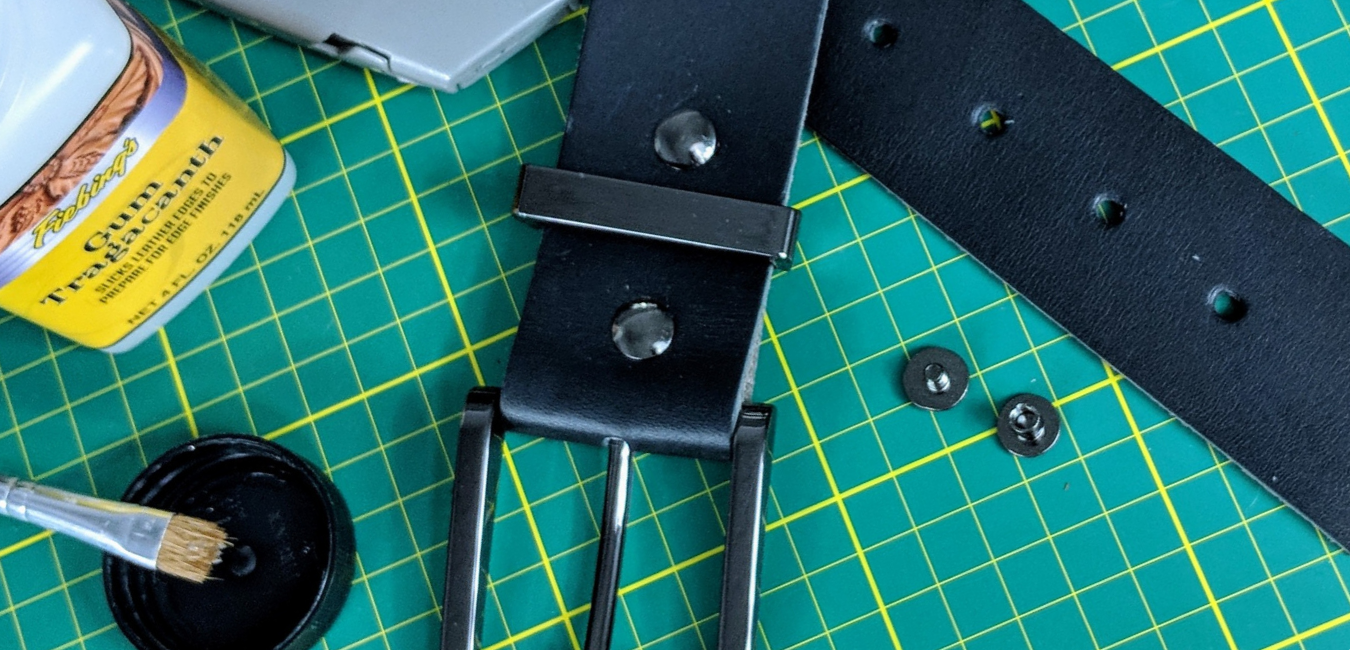
With all the holes punched and cut, you can now start attaching your hardware. Put the buckle and your belt loop into place, then add your Chicago screws on either side of your loop.
Make sure the screws go through both layers of your belt, then use your screwdriver to tighten them up. Using Chicago screws will allow you to easily update or change your buckle in the future. If you prefer to use more permanent hardware, such as rivets, feel free!
With that, the buckle end of your belt is finished!
If you are making this belt for yourself, you can now wrap the belt around your waist and get an accurate measurement to start punching your belt holes. If you have an old belt kicking around, you can lay that over your new belt as a template to ensure your sizing is correct.
Remember, the length of the belt needs to include the inches that your buckle may add, so include that in your final measurement. I do not advise using pant sizes to size your belt as sizing can vary from manufacturer to manufacturer (your Levis may be a size 38, but your Wrangler’s a size 40). Your safest bet is to work from an old belt or an actual waist measurement, taken recently.
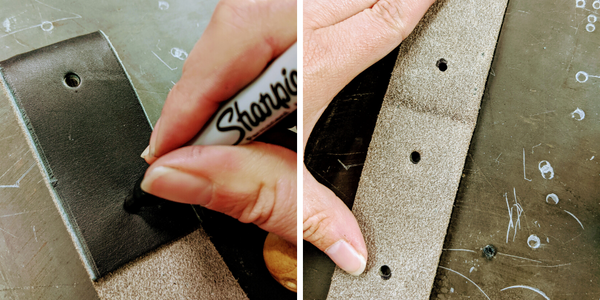
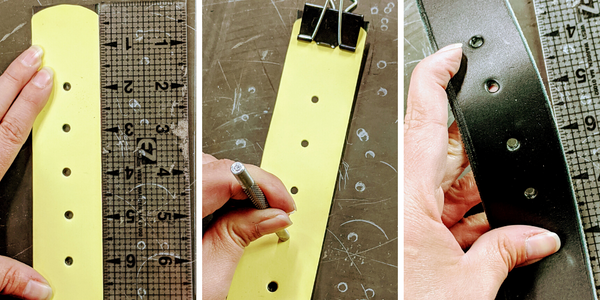
To decide where to punch your belt holes, you’ll want to find your size with a tape measure. Say your belt is going to be 36 inches. Find 36 inches and mark it. This will be your center hole. This way your belt can go a bit bigger or smaller than your ideal size.
Mark additional holes an inch apart in both directions from your center hole. I did five holes, so two on either side of the center. I created a paper template to make sure my spacing stayed even and straight. You could also use your old belt as a template to make it even easier!
Once you have your placement, go ahead and punch out those holes. Measure out 1-2 inches from your last punch to make your belt tip.
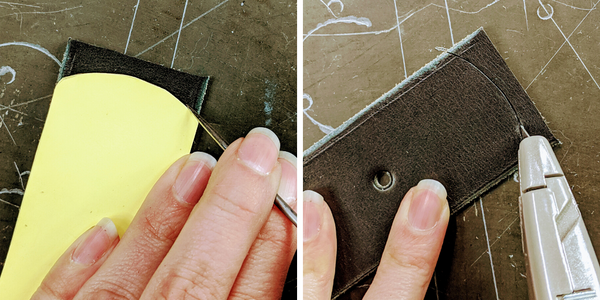
If you want just a squared edge, cut off any excess that may be leftover and you’re done. However, if you want a rounded or decorative belt tip, pick a shape you like, and carefully score it onto the leather so you can cut it with your knife.
And that there is a finished DIY belt. Super simple, no sewing, real leather.
If you want to clean up the edges, you can add some gum tragacanth to add some shine and smooth the textures. Depending on the leather you used, you could also burnish the edges with a wheel or burnishing tool. In this case, I used an oil-tanned strap, so it is softer in temper and harder to burnish. A little gum on its own gave it a neater finish. But if you were to use vegetable tanned leather, you could burnish it for sure, and get soft rounded edges.
Vegetable-tanned would also allow you to use leather dye and tool your belt. Just like many of our projects, it is up to you how complicated you would like to make it. This is just a simple belt, great for a beginner! Work your way up to lining, hand stitching, tooling, and more.
We love to see finished projects, be sure to tag us on social media with @theleatherguymn