

How To Paint, Marble, and Alcohol Ink On Leather
Have you ever been working on a leather project and just couldn’t find the right color or pattern? Paint is here to save the day! You can create so many custom colors and finishes just by getting yourself comfortable with paint.
There is any number of ways to customize your leather, and we will walk you through a few in this blog today!
We will start with hand painting, move on to marbling, and finish with alcohol inks!
Hand Painting Your Leather
The best type of paint for leather is a water-based acrylic paint. We highly recommend Angelus Acrylic Leather Paint! It is made to bend and flex without cracking and peeling. Plus, it comes in so many great colors.
Most leather is capable of being painted on. Natural colored Vegetable Tanned leather is ideal for this use because it has no finish or color to interfere with your painting.
However, should you want to apply some painted details to a metallic or embossed leather (like our Vegas Collection), you certainly can!
Here is a list of what you will need to paint:
-Paint Brushes
-Angelus Paint
-Acrylic Finish (optional)
-Washi or Artist Tape (optional)
Prepare The Leather
Before you begin, make sure to have a small drop cloth or newspaper on your workstation. Paint and Deglazer can be spilled or over-applied, so be sure you don’t ruin your tabletop.
You will want to make sure that the surface of the leather is clean and ready to take paint.
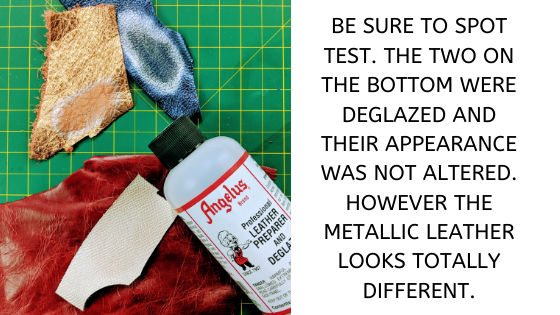
Deglazing the surface of your leather will give you the best surface for your paint to adhere to. You will want to apply the Deglazer with a cotton swab, cotton ball, rag or sponge. This will remove any factory finish that is on your leather and will ensure the best adhesion of the paint.
However, you will want to spot check this on the leather you are using. This stuff can remove color and can change the entire look of the leather.
If you do not want to remove the finish, wipe the leather down well with a clean, damp cloth and allow to fully dry. This should help to remove some of the oils or particles that may affect the paint.
The paint should still adhere, it just may not last as long as the manufacturer guarantees. While a finishing coat is not required with Angelus paints, you may want to add one in this case, to ensure the paint holds up well!
With the surface ready for painting, you can move on to creating your leather art!
Create Your Design
Make sure to mix your paint well before application, you don’t want the color to be runny or inconsistent!
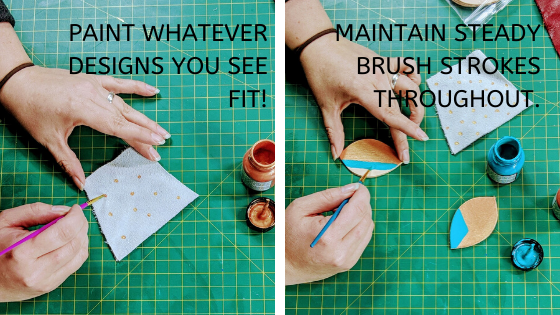
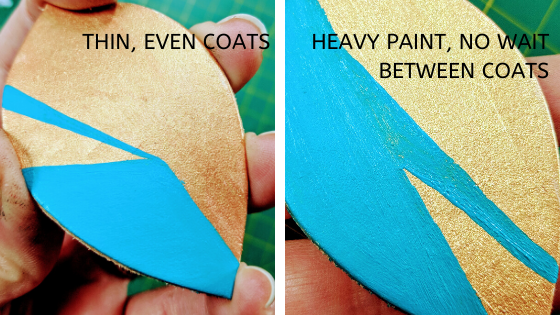
When you apply the paint, use a clean, good quality brush. Apply long and thin coats, making sure to spread the paint as evenly as possible. If paint is applied too thickly, you increase the chances that it will crack, peel, or fade.
Allow each layer of paint to dry completely before applying more. Feel free to use a blow dryer or even a heat gun to speed up the process!
When properly applied, you should not see any streaks or brush strokes.
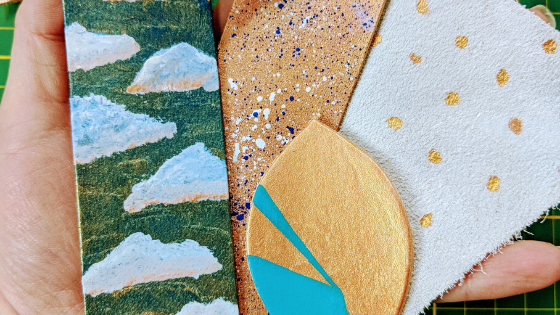
This is the fun part and your hand-painted creation can look any way you like!
Want an abstract pattern? Go for it! Want to do geometric shapes? Make it happen! Do you just want to add some polka dots to your favorite color leather? Absolutely!
If you want to create sharp lines on your piece, you can use tape to block out lines or shapes. But be sure to pick a low tack tape. Washi tape and some painters tapes will work just fine. Tape with a strong adhesive will leave residue on your leather and possibly ruin it!
Once your paint design is in place and dry, you can go on with finishing your piece, whether that’s mounting it, adding lace or jewelry hardware!
Marbling Leather

Marbled leather is always popular, but can sometimes be hard to find! The good news is that it is way easier than you think to create your own. Not to mention a lot of fun!
To marble your leather, you will need:
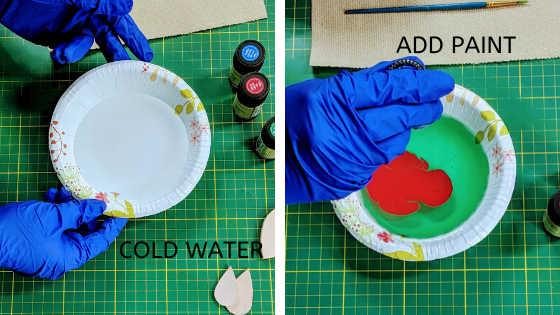
-A Bowl or Container With Clean, Cold Water
-Wood Skewers
-Gloves (to keep the paint off your hands)
As far as paint goes, we really like a product called Easy Marble by Marabu.
You can pick this up from our friends at Wet Paint up in Saint Paul, MN. Not local? No worries, they will ship right to you! Plus, they are an awesome resource for all your art supply needs and questions, so be sure to check them out.
Easy Marble can dry in as quickly as 15 minutes and is fairly easy to work with. It takes some practice to get your designs just so, but part of the fun of marbling is the inconsistency and variations in the colors and patterns!
Creating Your Design
With gloved hands, start adding drops of paint to your water. Add two, three, four...however many you like to achieve the color intensity you want. This is your design. Bear in mind that the second color you add most times will be the strongest color in the design.
Once the paint is in the water, you will want to work quickly, it does start to harden and set right away!
Get your skewer out and make your design. Swirl the skewer through the paint in figure 8, or make wavy lines throughout. Once you’re happy with the marbled look, it's time to get the leather in there!
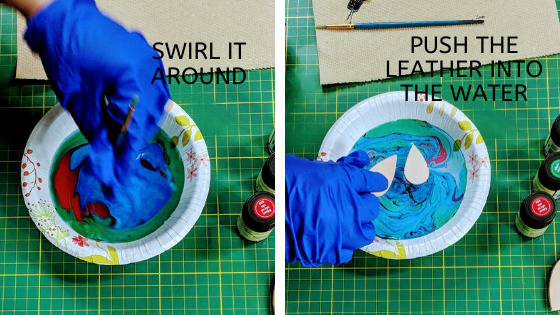
Set your leather on the water’s surface and give the paint a moment to adhere.
This paint will wrap all the way around your leather piece if you completely submerge it in the water. If you do not want the design on the back of the leather, you may want to protect it with tape beforehand. Otherwise, you can just set the leather on the surface, but you may still get some spillover when you try to lift it out.
Remove the leather from the water and you will have a totally one of a kind design. Set the piece to the side on your drop cloth or paper towels and let it dry.
If you want to create a new design, you will need to remove any leftover paint from the water’s surface. Simply let it set up a little longer, then drop a scrap piece of paper or paper towel on the surface and the paint will adhere to it, leaving you clean water to start again!
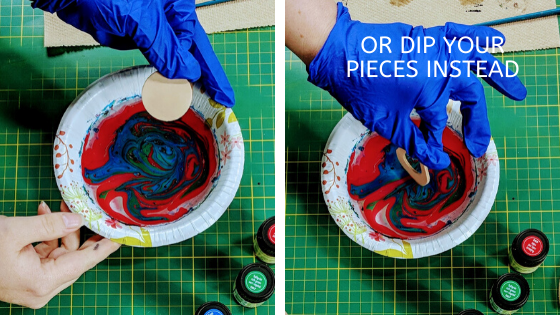
Try partially dipping your leather into the paint for a totally different look, that doesn’t cover the beauty of your leather.
And that is it, you have created marbled leather! Make yourself marbled leather coasters or earrings or sheath inlays or cuff bracelets...whatever moves you!

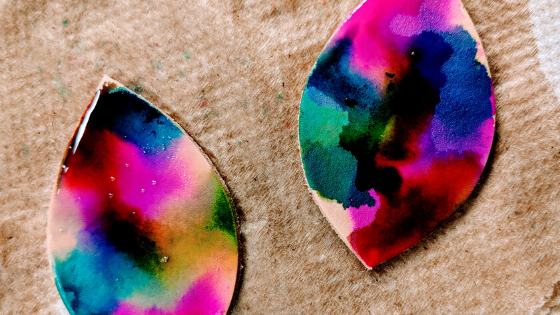
Alcohol Ink And Leather

This is an interesting process using an ink that has been growing in popularity lately. This will penetrate the leather much like a dye, but it allows you to layer and work in a number of colors that you may not be able to do with a traditional leather dye.
Working with alcohol ink on leather may remind you of watercolors. You have to keep it wet to move it and blend it, and it creates a really dreamy look when dry.
Here are the items you need for this process:
-Alcohol Ink (we are using the Ranger-Jim Holtz Alcohol Inks)
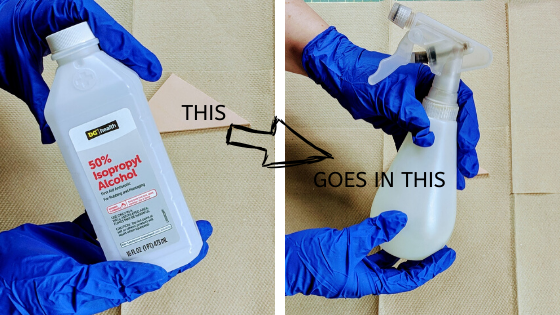
-Rubbing Alcohol
-Spray Bottle
-Gloves
To prep, make sure your workspace is well protected. The above mentioned rubbing alcohol will be used with a spray bottle and the alcohol can damage some surfaces. Gloves are great too because rubbing alcohol isn’t really great for your skin in large amounts either! Plus, alcohol inks will stain whatever they come in contact with, including your hands.
Creating Your Design
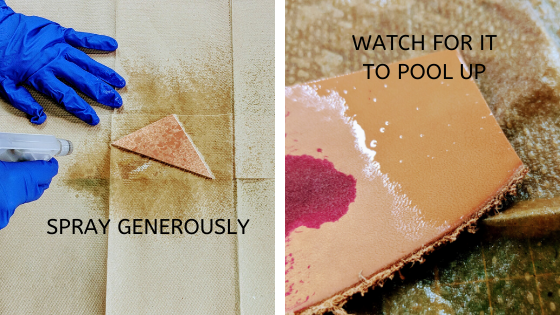
Place your leather in your workspace. Begin spraying it with rubbing alcohol. You will notice the leather will soak up any moisture you add to it fairly quickly and the alcohol will be very fast drying. For this to work, you need to spray enough that it eventually pools on top of the leather.
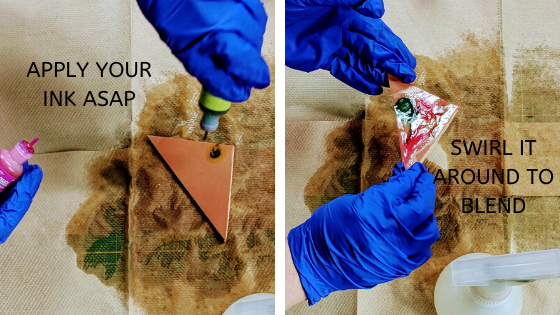
Once you have your pool of rubbing alcohol, you will want to start applying your ink rather quickly. Drop each color wherever you prefer! Remember, they will blend into one another and create new colors really easily.
Blow on the ink, or lift the leather piece and tip it in different directions to get the ink to flow and blend.
Once the leather starts to dry, you will not be able to change the ink. If you want to keep working with it, keep spraying the alcohol. Spraying on to the partially dry ink will give you a very cool effect.
When you have the colors where you want them, set the piece aside and let it dry. It will take some time for the leather to dry completely considering how much alcohol you have to spray!

When the leather has dried, you can then cut it into other shapes or add paint to the top or sides. It is up to you and what you are making with your newly inked leather!
Alcohol ink can be used in a variety of ways, depending on the look you are going for. We really like how it gives natural veg tan an interesting dyed appearance while not taking away from the hand feel you get with this leather. Feel free to try your hand with the inks and use different processes. They're really fun to tinker with!
That there are a few different ways to make your leather goods stand out from the rest! Creating custom pieces takes more time, but it can be really enjoyable and result in a piece that is truly yours. Which techniques are you most excited to try out?
We’d love to see what you make! If you create something, share it with us at sales@theleatherguy.org or tag us on social media with @theleatherguymn. Thanks for reading and we look forward to seeing your work!